Iliotibial (IT) band syndrome is a common overuse injury for runners and athletes, causing lateral knee pain and reduced mobility. This article explains the biomechanics and risk factors, then provides an evidence-informed toolkit of immediate relief steps, targeted stretches, mobility drills, and progressive strengthening to reduce symptoms and help you return to training safely.
Understanding IT band syndrome and risk factors
The iliotibial band is a thick layer of connective tissue. It is a type of fascia that runs along the outside of the thigh. This structure begins at the iliac crest of the pelvis, travels down the leg, and attaches to the lateral condyle of the tibia. This attachment point is known as Gerdy’s tubercle. The band is not a muscle; it is a non-elastic, tension-bearing structure. It works with the tensor fasciae latae muscle and the gluteus maximus. These muscles tension the band to help stabilize the hip and the knee during movement. The band passes over the greater trochanter at the hip and the lateral femoral epicondyle at the knee.
The way we understand the pain has changed recently. Older theories focused on a friction model, suggesting the band rubbed back and forth over the bone like a guitar string. Modern research suggests a compression model is more accurate. A layer of fat and connective tissue rich in nerves and blood vessels sits between the band and the lateral femoral epicondyle. When the knee bends to an angle of 20 to 30 degrees, the band compresses this sensitive tissue. This specific range is called the impingement zone. Repetitive compression during this phase of movement leads to inflammation and pain.
The condition is prevalent among active people. Research shows that iliotibial band syndrome affects between 5% and 14% of runners. It is the most common cause of pain on the outside of the knee for this group, accounting for about 12% of all running-related knee injuries. Cyclists and military personnel also experience high rates of this injury. The problem is rarely caused by one single factor; it is usually a combination of training habits and body mechanics.
Training errors are a primary cause of flare-ups. Rapidly increasing mileage or intensity can overload the tissue. Running on slanted surfaces is another risk; the crown of a road causes one foot to land lower than the other, increasing tension on the lateral side of the down-slope leg. Inappropriate footwear can also play a role. Worn-out shoes or shoes that do not support the foot properly can change how the leg absorbs force.
Biomechanical factors are equally important. Weakness in the hip abductors is a frequent contributor. If the gluteus medius is weak, the pelvis may drop on the opposite side during a stride. This is called a Trendelenburg gait. This drop increases the angle of the thigh bone toward the midline, putting more tension on the IT band. Excessive foot pronation can also cause the lower leg to rotate inward, pulling on the attachment point at the knee. Tight hip flexors and quad dominance can change the way the pelvis tilts, altering the baseline tension of the band before a person even starts moving.
Symptoms usually follow a predictable pattern. The pain is felt on the outside of the knee, often located about two or three centimeters above the joint line. The sensation is usually sharp or burning and starts after a specific amount of activity. A runner might feel fine for the first two miles, but the pain then appears and gets worse with every step. Downhill running is a major trigger because it increases the time the knee spends in the impingement zone. Repetitive cycling can also cause issues if the saddle height is incorrect.
It is important to distinguish this syndrome from other knee problems. Several conditions can mimic the symptoms.
| Condition | Primary Pain Location | Key Differences |
|---|---|---|
| IT Band Syndrome | Outside of the knee above the joint | Pain is worse at 30 degrees of knee bend. No joint swelling. |
| Lateral Meniscal Injury | Directly on the joint line | Often involves joint swelling. The knee may click or lock. |
| Patellofemoral Pain | Behind or around the kneecap | Pain is worse with stairs or sitting for long periods. |
| Greater Trochanteric Pain | Outside of the hip | Pain is felt at the hip bone rather than the knee. |
| Hamstring Tendinopathy | Back and outside of the knee | Pain is triggered by resisted knee flexion or deep stretching. |
Referred pain from the lumbar spine can also cause lateral leg pain. This happens when a nerve in the lower back is compressed. This type of pain often feels like a dull ache or a tingling sensation and does not usually get worse with specific knee angles.
The multifactorial nature of the condition is why simple solutions often fail. Stretching the band itself is difficult because the tissue is so thick; it requires massive amounts of force to actually lengthen the fascia. Most people find that a single treatment like foam rolling or icing provides only temporary relief. Lasting mobility requires addressing the root causes: improving hip strength, fixing gait mechanics, and managing the training load.
Current evidence suggests that female runners may be at a higher risk, potentially due to wider pelvic structures that increase the angle of the femur. Younger athletes and those with fewer years of experience also show higher incidence rates, often because their tissues have not yet adapted to the stresses of high-volume training. Slower running speeds can sometimes increase the risk as well, as slower paces often lead to more time spent in the impingement zone during each stride.
Understanding these factors is the first step toward recovery. You can read more about the statistics and risk factors in this systematic review of iliotibial band syndrome in runners. Recognizing that the pain comes from compression rather than just tightness changes how you approach treatment. It moves the focus away from aggressive rubbing and toward better movement patterns. This shift is essential for athletes who want to return to pain-free movement. It requires patience and a structured approach to strengthening the entire kinetic chain. Focusing on the hip and the foot is just as important as focusing on the knee itself.
Assessment, immediate self-care, and when to seek help
Identifying the root of lateral knee pain requires a methodical approach because the symptoms often mimic other issues. You can start with a simple single-leg squat observation to check your functional stability. Stand on one leg and slowly lower yourself into a shallow squat while watching your hips in a mirror. If the hip on the non-standing side drops toward the floor, you are seeing the Trendelenburg sign. This indicates that your hip abductors are not firing well enough to keep your pelvis level. This lack of control often leads to the IT band working overtime to stabilize the leg. You should also pay attention to your knee position during this movement. If the knee caves inward toward the midline, it suggests poor control of hip rotation, which increases the compression on the outside of the knee.
Walking and running gait observation provides further clues. You might notice your foot rolling inward excessively or your knee snapping into extension during the mid-stance phase of your stride. These subtle shifts change how the IT band crosses the bony part of your outer knee. To find that specific spot, you can perform a palpation of the lateral femoral epicondyle. This is the prominent bony bump on the outside of your knee. If pressing directly on this spot or just above it causes sharp pain, it is a strong indicator of IT band involvement.
The Noble compression test is a classic diagnostic tool you can try with a partner. Lie on your back and have someone apply pressure with their thumb to that lateral femoral epicondyle while slowly straightening your knee from a bent position. If you feel a familiar sharp pain when the knee reaches about 30 degrees of flexion, the test is considered positive. Another common assessment is the Ober test. Lie on your side with the affected leg on top. Have a partner stabilize your pelvis and then lift your top leg, move it slightly backward, and try to lower it toward the floor behind your bottom leg. If the leg stays hovering in the air and cannot drop down, it suggests significant tightness in the IT band and the tensor fasciae latae muscle.
It is important to distinguish between biomechanical contributors and internal joint issues. Findings like a hip drop or poor knee control usually point to movement patterns that you can correct with training. However, if you notice significant joint swelling, a sensation of the knee locking in place, or a feeling of the joint giving way, the cause might be different. Swelling inside the joint capsule or mechanical catching often suggests a meniscus tear or a cartilage injury rather than simple IT band irritation.
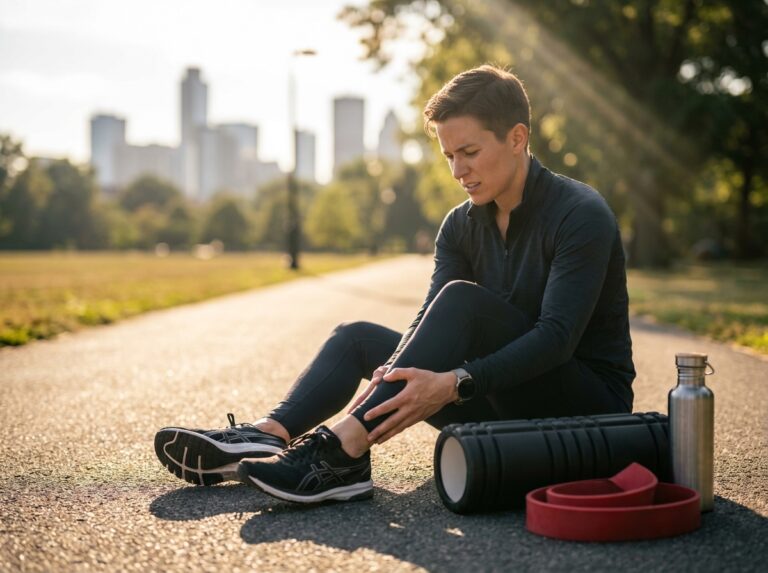
When a flare occurs, immediate self-care is about calming the system. Load reduction is the most effective first step. You should cut your running mileage by 30 to 100 percent depending on your pain levels. A useful guideline is the “two out of ten” rule: if your pain stays below a 2 on a scale of 10, you may continue with modified volume. If the pain exceeds this or causes you to change your gait, you need a total break from impact. During this time, you can use temporary activity substitution to maintain your fitness. Swimming is an excellent choice because it removes all weight-bearing stress. The elliptical or stationary cycling can also work, but only if they do not trigger the lateral knee pain.
Icing can help manage the acute discomfort. Apply an ice pack to the lateral epicondyle for 10 to 15 minutes up to 3 times per day. This is most effective after any activity that irritates the area. You might also consider the sensible use of over-the-counter anti-inflammatories. These can reduce the local chemical irritation, but you must use them with caution. Do not use medication to mask pain just so you can continue running, as this often leads to more significant tissue damage.
Your footwear and equipment also play a role in your recovery. Check the soles of your shoes for uneven wear patterns. A general rule is to replace running shoes every 300 to 500 miles; if the outer edge of the heel is completely worn down or if the shoe leans to one side when sitting on a flat surface, it is time for a new pair. Some athletes benefit from orthotics if they have significant leg length discrepancies or excessive foot pronation. Simple gait cueing can also help. Try to increase your step rate by about 5 percent or imagine running on two separate tracks to prevent your feet from crossing the midline. This reduces the angle at which the IT band pulls across the knee.
While most cases of IT band syndrome respond well to home care, you must know when to seek professional help. There are specific red flags that prompt a clinical assessment. If you experience persistent high pain at rest or during the night, it may indicate a more serious inflammatory condition. Marked weakness in the leg or numbness and tingling are also signs that a nerve might be involved. If you experience a total loss of function or mechanical locking of the joint, you should see a specialist immediately. Furthermore, if you see no meaningful improvement after 6 to 8 weeks of consistent conservative care, a professional evaluation is necessary.
A physical therapist plays a vital role in long-term recovery. They can provide a targeted exercise prescription and gait retraining to fix the movement faults you identified during your self-tests. They might also use manual therapy or dry needling to release tight tissues around the hip and thigh. In some cases, a clinician might consider imaging. An X-ray can rule out bone issues, while an MRI or ultrasound can visualize the soft tissues and the bursa. According to a systematic review of IT band syndrome in runners, the condition is the most common cause of lateral knee pain, but it requires a comprehensive approach.
Interventions like local corticosteroid injections or platelet-rich plasma (PRP) injections are sometimes used when conservative methods fail. These are only indicated if there is significant localized inflammation or if the tissue is not healing. Surgical options are extremely rare and are only considered a last resort when all other treatments have been exhausted over many months. Most athletes find that a combination of rest, smart loading, and specific strengthening allows them to return to their sport without needing invasive procedures. Focus on the basics of movement quality and gradual progression to ensure your recovery lasts.
Best stretches, mobility drills, and strengthening exercises
Once you have identified the signs of IT band syndrome through the assessments mentioned previously, the focus shifts to movement. Recovery is not just about resting. It requires a specific balance of calming the irritated tissue and building the strength needed to handle the demands of your sport. This process involves stretching, myofascial release, and progressive loading.
Foundational Stretches and Mobility
Stretching can provide immediate relief for the feeling of tightness in the lateral thigh. You should perform these moves twice daily. Hold each position for 30 seconds and repeat the cycle 2 or 3 times. If you feel sharp or increasing pain, stop immediately. The goal is a gentle pull, not a reproduction of your injury symptoms.
Standing Crossover Lean
Stand with your feet together. Cross the affected leg behind your healthy leg. Keep both feet flat on the floor. Reach the arm on the same side as the affected leg up and over your head. Lean your torso toward the healthy side. You should feel a stretch along the outside of your hip and down toward the knee. Hold this for 30 seconds. Breathe slowly into your side ribs to deepen the sensation.
Supine Figure Four Glute Stretch
Lie on your back with both knees bent. Place the ankle of your affected leg across the opposite knee. Reach your hands through the gap and grab the back of your healthy thigh. Pull your legs toward your chest until you feel a stretch in the glute of the affected side. Keep your tailbone tucked toward the floor. Avoid rounding your lower back excessively. This targets the glutes which often contribute to IT band tension.
Modified Pigeon Pose for Runners
Traditional pigeon pose on the floor can be hard on the knees. Instead, use a bench or a sturdy table. Place your front leg on the elevated surface with the knee bent at a 90-degree angle. Keep your back leg straight on the ground. Lean your chest forward slightly while keeping your spine long. This modification allows you to control the pressure on the lateral knee while still opening the hip.
Side Lying ITB and Glute Stretch
Lie on your healthy side. Bend your bottom leg for stability. Reach back and grab the ankle of your top leg as if doing a quad stretch. Gently pull your heel toward your glute. Slowly lower your top knee toward the floor behind your bottom leg. You will feel this along the front and side of the hip. This helps release the tensor fasciae latae, which is the muscle that pulls on the IT band.
Hip Flexor Release
Kneel on one knee with the other foot in front. Tuck your pelvis under to flatten your lower back. Shift your weight forward slightly until you feel a stretch in the front of the hip. Tight hip flexors can cause the pelvis to tilt forward. This tilt increases the tension on the IT band during the running gait.
Foam Rolling Technique and Limits
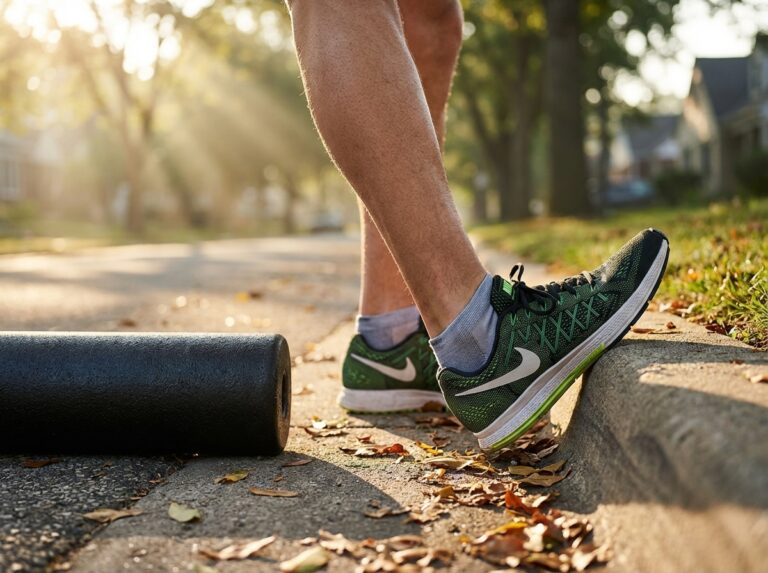
Foam rolling is a popular tool for temporary symptom relief. It does not actually lengthen the IT band because that tissue is incredibly thick and strong. It works by desensitizing the nervous system and improving blood flow to the surrounding muscles. Use a slow sweep technique from the hip down toward the knee. Avoid rolling directly over the bony prominences of the hip or the side of the knee joint. Spend 1 to 2 minutes per side. You should feel tolerable discomfort. If the pain is sharp or causes you to hold your breath, you are pressing too hard. Do not roll the area if it is in an acute, inflammatory stage with visible swelling.
Dynamic Mobility and Activation Warm Ups
Before you run or lift, you need to wake up the muscles that stabilize the pelvis. These drills improve coordination. They also prepare the joints for impact. Perform 2 to 4 sets of 10 to 20 repetitions for each move.
- Lateral Leg Swings. Stand on one leg and swing the other leg out to the side and back across your body. Keep your torso upright.
- Hip CARs (Controlled Articular Rotations). Stand on one leg. Lift the other knee toward your chest. Rotate the hip out to the side. Circle it back and down. Move slowly to explore the full range of the joint.
- Monster Walks. Place a resistance band around your ankles. Step forward and slightly outward in a diagonal pattern. Keep your knees pushed out.
- Lateral Band Walks. With the band still around your ankles, take small steps to the side. Keep your feet parallel. Do not let your knees cave inward.
- Clamshells. Lie on your side with knees bent. Lift your top knee while keeping your feet together. Focus on using the back of your hip.
- Glute Bridges. Lie on your back and lift your hips toward the ceiling. Squeeze your glutes at the top. Do not arch your lower back.
Progressive Strengthening for Lasting Relief
Strength training is the most important part of recovery. Research suggests that iliotibial band syndrome in runners is often linked to weakness in the hip abductors and external rotators. You should perform these exercises 2 or 3 times per week.
Side Lying Hip Abduction
Lie on your side with your legs straight. Lift your top leg toward the ceiling. Keep your toes pointed forward or slightly down. Ensure your leg stays slightly behind your torso to engage the gluteus medius. Lower the leg slowly. This eccentric control is vital for stabilizing the knee during running.
Single Leg Romanian Deadlifts
Stand on one leg with a slight bend in the knee. Hinge at the hips while reaching your other leg back. Keep your hips level. This exercise builds balance. It also strengthens the hamstrings and glutes which support the IT band.
Split Squats
Take a long step forward. Lower your back knee toward the ground. Keep your front knee tracked over your middle toe. Do not let the front knee collapse inward. This movement mimics the loading phase of a running stride.
Lateral Step Ups
Stand sideways next to a step. Place one foot on the step and drive upward. Control the descent for 3 seconds. This eccentric emphasis helps the muscles absorb force more effectively.
Training Frequency and Modifications
Consistency is the key to tissue adaptation. Use the following table to structure your weekly routine based on your current pain levels.
| Activity | Acute Phase (High Pain) | Recovery Phase (Low Pain) | Maintenance (No Pain) |
|---|---|---|---|
| Mobility & Stretching | Daily (Gentle) | Daily | 3 to 4 times per week |
| Strength Training | 2 times per week (Bodyweight) | 3 times per week (Loaded) | 2 times per week (Heavy) |
| Foam Rolling | Avoid inflamed areas | 1 to 2 minutes daily | As needed for recovery |
| Running/Impact | Complete rest or swimming | Run-walk intervals | Gradual volume increase |
For runners, a 3 to 6 minute pre-run activation sequence is mandatory. Include glute bridges and lateral band walks to ensure your hips are ready to work. After your run, spend 5 minutes on the crossover lean and hip flexor stretches. Lifters should focus on hip mobility before squatting or deadlifting to prevent the IT band from snapping over the femoral epicondyle.
Common Mistakes to Avoid
Many athletes fail to recover because they rely too much on passive treatments. Stretching feels good, but it does not fix the underlying strength deficit. If your hip drops every time you take a step, no amount of stretching will stop the IT band from being compressed. Another mistake is excessive foam rolling during an acute flare. If the area is already inflamed, aggressive rolling can increase irritation. Finally, do not return to your full mileage too quickly. The IT band needs time to adapt to the new mechanics you are building through strength work. Increase your volume by no more than 10 percent per week to ensure the pain does not return.
Conclusions and practical action plan
The evidence gathered from years of clinical observation and recent studies shows that iliotibial band syndrome is not a simple case of a tight muscle. It is a complex overuse issue that affects between 5 percent and 14 percent of runners. Research published in 2024 highlights that certain groups, such as female athletes and those with fewer years of recreational experience, face a higher risk. Interestingly, slower average running speeds are also linked to higher risk levels, likely because a slower pace increases the time spent in the specific knee angle (20 to 30 degrees) where peak friction occurs.
The most important takeaway is that stretching the band itself is rarely the answer. The iliotibial band is a thick piece of connective tissue that cannot be lengthened with simple pulls. True relief comes from a combination of load management and strengthening the muscles that control the hip. When the gluteus medius and other hip abductors are weak, the thigh bone can rotate inward too much, increasing compression on the sensitive tissues under the band at the outside of the knee. Successful recovery requires a shift in focus: move away from just treating the pain and start building the strength to handle the demands of your sport.
The Core Recovery Strategy
A lasting solution involves four main pillars. First, you must manage the load by reducing your mileage or intensity to a level that does not cause a flare-up. Second, you need to strengthen the hip and gluteal muscles to improve pelvic stability. Third, daily mobility work helps maintain the range of motion in the surrounding joints. Finally, a gradual return to activity ensures the tissue can adapt to stress without becoming inflamed again. This process usually takes between 4 and 8 weeks of consistent effort. You can find more details on these risk factors in the Full article: Risk factors associated with a history of iliotibial band syndrome.
Recovery Phases
Understanding where you are in the healing process helps set realistic expectations. Use this table to identify your current phase.
| Recovery Phase | Typical Duration | Primary Focus |
|---|---|---|
| Acute Phase | 1 to 2 weeks | Pain reduction and inflammation control |
| Sub-Acute Phase | 2 to 4 weeks | Hip and glute activation exercises |
| Strengthening Phase | 4 to 8 weeks | Progressive loading and single-leg stability |
| Return to Run | 6 to 12 weeks | Gradual mileage increase and gait retraining |
Practical 4-Week Action Plan
This plan is designed to transition you from acute pain back to regular movement. It balances daily maintenance with targeted strength sessions. The goal is to build a body that can support the knee joint properly during every stride or lift.
| Week | Daily Mobility (5-10 min) | Strength Sessions (2-3x Weekly) | Activity Progression |
|---|---|---|---|
| 1-2 | Hip CARs and hip flexor releases. Focus on gentle movement. | Clamshells, glute bridges, and side-lying leg lifts. 3 sets of 15 reps. | Walk only or very short run-walk intervals. Keep pain at 0 out of 10. |
| 3-4 | Add dynamic drills like lateral leg swings. | Monster walks with bands and single-leg deadlifts. Add light resistance. | Run-walk intervals. For example, run 2 minutes and walk 1 minute. |
| 5-6 | Continue daily mobility to maintain joint health. | Split squats and lateral step-ups. Focus on controlled movements. | Increase running intervals. Decrease walking time. |
| 7-8 | Pre-run activation drills for 5 minutes. | Loaded squats and lunges. Focus on maintaining hip alignment. | Gradual return to continuous running. Follow the 10 percent rule. |
Strength Session Details
Your strength workouts should last about 30 to 40 minutes. Focus on the quality of movement rather than the amount of weight. During exercises like the single-leg squat, watch for a hip drop (Trendelenburg sign). This shows that your hip stabilizers are not yet strong enough. If you see your hip dropping, use a mirror to correct your form or reduce the depth of the squat. Exercises like the monster walk or lateral band walk are excellent for engaging the gluteus medius. Aim for 2 to 3 sessions per week with at least one day of rest between them.
Criteria for Progression
You should only move to the next stage of the plan if you meet specific safety markers. First, your pain during the activity must stay at or below a 2 out of 10 on a standard pain scale. Second, you should have no worsening of symptoms the next morning. If the area feels stiffer or more painful the day after a workout, you have done too much. Third, never increase your total weekly running volume by more than 10 percent. This conservative approach gives your tendons and fascia time to thicken and strengthen without failing.
When to See a Clinician
Most cases of iliotibial band syndrome respond well to this conservative approach. However, professional help is necessary in some situations. You should seek a referral to a physical therapist or a doctor if you see no improvement after 6 to 8 weeks of consistent work. Severe symptoms that make it hard to walk or pain that stays present even at rest are red flags. You must also seek immediate care if you experience neurological signs. These include numbness, tingling, or significant weakness in the leg. A professional can provide gait retraining or check for other issues like a lateral meniscal injury or patellofemoral pain.
A Note on Consistency
Recovery is rarely a straight line. You might have days where the knee feels perfect and others where it feels slightly sensitive. The key is to stay committed to the small daily steps. Track your progress in a journal or an app. Note your pain levels and the distance you covered. Seeing those small wins over 4 to 8 weeks will help you stay motivated. Focus on the long-term goal of pain-free movement. By building a stronger foundation today, you are protecting your joints for years of running and lifting to come.
References
- Full article: Risk factors associated with a history of iliotibial band … — Iliotibial Band Syndrome (ITBS) is one of the most common gradual onset running-related injuries (GORRIs) with an annual incidence of 7% to 14% …
- Iliotibial band syndrome in runners: a systematic review – NCBI – NIH — Iliotibial band syndrome (ITBS) is the most common injury of the lateral side of the knee in runners, with an incidence estimated to be between 5% and 14%.
- [PDF] comparison the prevalence and associated risk factors of iliotibial … — Iliotibial Band. (ITB) syndrome affects between 5 and 14% of runners, making it one of the most common causes of lateral knee pain. I.T.B. Syndrome is …
- Runner's Knee/Illiotibial Band Syndrome — Internet searches for the incidence rate of illiotibial band (ITB) syndrome reveals that this malady accounts for an approximate 12% of knee …
- Iliotibial band syndrome — Based upon limited observational studies, ITBS affects approximately 1.6 to 12 percent of runners [2,4-7,9]. The relative incidence among runners has …
- IT Band Syndrome: Relief and Prevention – Medi-Dyne — The estimated incidence rate for athletes is believed to be between 5% and 14%. … Studies comparing runners with IT Band Syndrome to healthy …
- The Iliotibial Band: A Complex Structure with Versatile Functions — ITB pain is common in runners (a 5–14% prevalence of all running-related injuries) [22]. We would expect that such a common injury would be well …
Legal Disclaimers & Brand Notices
The content provided in this article is for informational purposes only and does not constitute professional medical advice, diagnosis, or treatment. Always seek the advice of a physician or other qualified health provider with any questions you may have regarding a medical condition, assessment, or treatment plan. Never disregard professional medical advice or delay in seeking it because of something you have read in this article.
All product names, logos, and brands are property of their respective owners. All company, product, and service names used in this article are for identification purposes only. Use of these names, logos, and brands does not imply endorsement.