Pelvic tilt—anterior or posterior—alters posture, movement mechanics, and can drive low back or hip pain for everyday athletes. This article breaks down the anatomy and biomechanics of pelvic tilt, methods for self-assessment, and evidence-based correction strategies that combine mobility, targeted stretching, and progressive strengthening to restore a neutral pelvis and enable pain-free movement.
How Pelvic Tilt Works Anatomy and Biomechanics
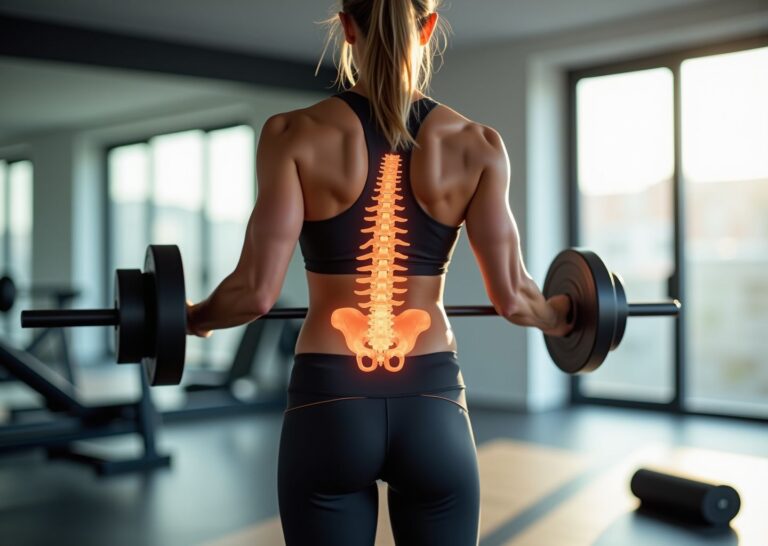
Understanding the anatomy of the pelvis is the first step toward correcting its alignment. Think of your pelvis not just as a single bone, but as the central hub of your body, connecting your spine to your legs. Its position dictates how the rest of your body stacks up and moves. The most common deviations from a balanced position are an anterior pelvic tilt and a posterior pelvic tilt.
Let’s use a simple analogy. Imagine your pelvis is a bowl of water. If the bowl is level, the water sits perfectly still. This is pelvic neutrality. In this position, your core and glutes can function optimally, and the stress on your spine and hips is balanced. Now, if you tip the bowl forward so water spills out the front, you have an anterior pelvic tilt (APT). If you tip it backward so water spills out the back, you have a posterior pelvic tilt (PPT).
To get more specific, we can look at a few key bony landmarks. Find the bony points at the very front of your hips; these are your Anterior Superior Iliac Spines (ASIS). Now, imagine two points on your lower back, just above your glutes; these are your Posterior Superior Iliac Spines (PSIS). In a neutral pelvis, the ASIS and PSIS are roughly level with each other.
- In an anterior pelvic tilt, the front of the pelvis drops and the back rises. Your ASIS points will be significantly lower than your PSIS. This creates an exaggerated arch in your lower back.
- In a posterior pelvic tilt, the front of the pelvis rises and the back drops or tucks under. Your ASIS points will be higher than your PSIS. This tends to flatten the natural curve of your lower back.
This tilting isn’t random; it’s the result of a muscular tug-of-war. Certain muscle groups pull the pelvis in one direction, while others pull it in the opposite direction. Imbalances, where one group is chronically tight and the opposing group is weak, are the primary drivers of a non-neutral pelvic tilt.
The muscles that promote an anterior pelvic tilt are primarily the hip flexors and the lumbar extensors (your low back muscles).
The “Forward Tipping” Team (APT)
Hip Flexors: This group includes the iliopsoas, rectus femoris (one of your quad muscles), and the tensor fasciae latae (TFL). When these muscles are tight, often from prolonged sitting, they pull the front of the pelvis down toward the thigh, contributing to APT.
Erector Spinae: These are the muscles running along your spine. When they are overactive or tight, they pull the back of the pelvis upward, increasing the arch in your lower back and reinforcing the forward tilt.
On the other side of the rope are the muscles that create a posterior pelvic tilt.
The “Backward Tipping” Team (PPT)
Abdominal Wall: This includes the rectus abdominis (“six-pack” muscle), obliques, and the deep transverse abdominis. When these muscles engage, they pull the front of the pelvis upward, toward the rib cage.
Hip Extensors: This group is dominated by the gluteus maximus and the hamstrings. When they contract, they pull the back of the pelvis downward, effectively tucking your tailbone under.
An anterior pelvic tilt is often the result of tight hip flexors and erector spinae overpowering weak abdominals and glutes. This pattern of glute weakness is incredibly common in modern life. Conversely, a posterior pelvic tilt can result from overactive, tight hamstrings and abdominals combined with weak hip flexors and lumbar extensors.
These imbalances have significant biomechanical consequences. An excessive anterior pelvic tilt increases the curve in your lower back (lumbar lordosis), which can compress the spinal joints. It also changes how the head of your femur sits in the hip socket, potentially altering load distribution during activities like running and squatting. This can make it difficult to properly engage your glutes during a squat or deadlift, forcing your low back and hamstrings to compensate. A posterior pelvic tilt, on the other hand, flattens the lumbar spine, reducing its natural shock-absorbing capacity and potentially placing more stress on the discs. During movement, it can limit your hip flexion, making deep squats challenging.
It’s important to approach the topic of pelvic tilt and pain with a modern, evidence-based perspective. For years, any deviation from neutral was seen as a direct cause of low back pain. However, research from the last decade, including studies in journals like the European Spine Journal, shows a more complex picture. While a strong association between significant anterior pelvic tilt and low back pain exists, causation is not guaranteed. Many people live with a notable pelvic tilt and experience no pain at all. The bigger issue often isn’t the static posture itself, but the inability to move freely in and out of it. A healthy system can transition between anterior and posterior tilt with ease. Problems arise when you’re “stuck” in one position due to muscular imbalances, which limits your movement options and forces other parts of your body to compensate.
How to Recognize and Assess Anterior Versus Posterior Tilt
Before attempting to correct a pelvic tilt, you must first systematically assess your own unique pattern. This process isn’t about finding flaws; it’s about gathering the information needed to create an effective plan. You can perform these checks yourself with a mirror, a smartphone, or with the help of a coach or training partner.
The Visual Check: What to Look For
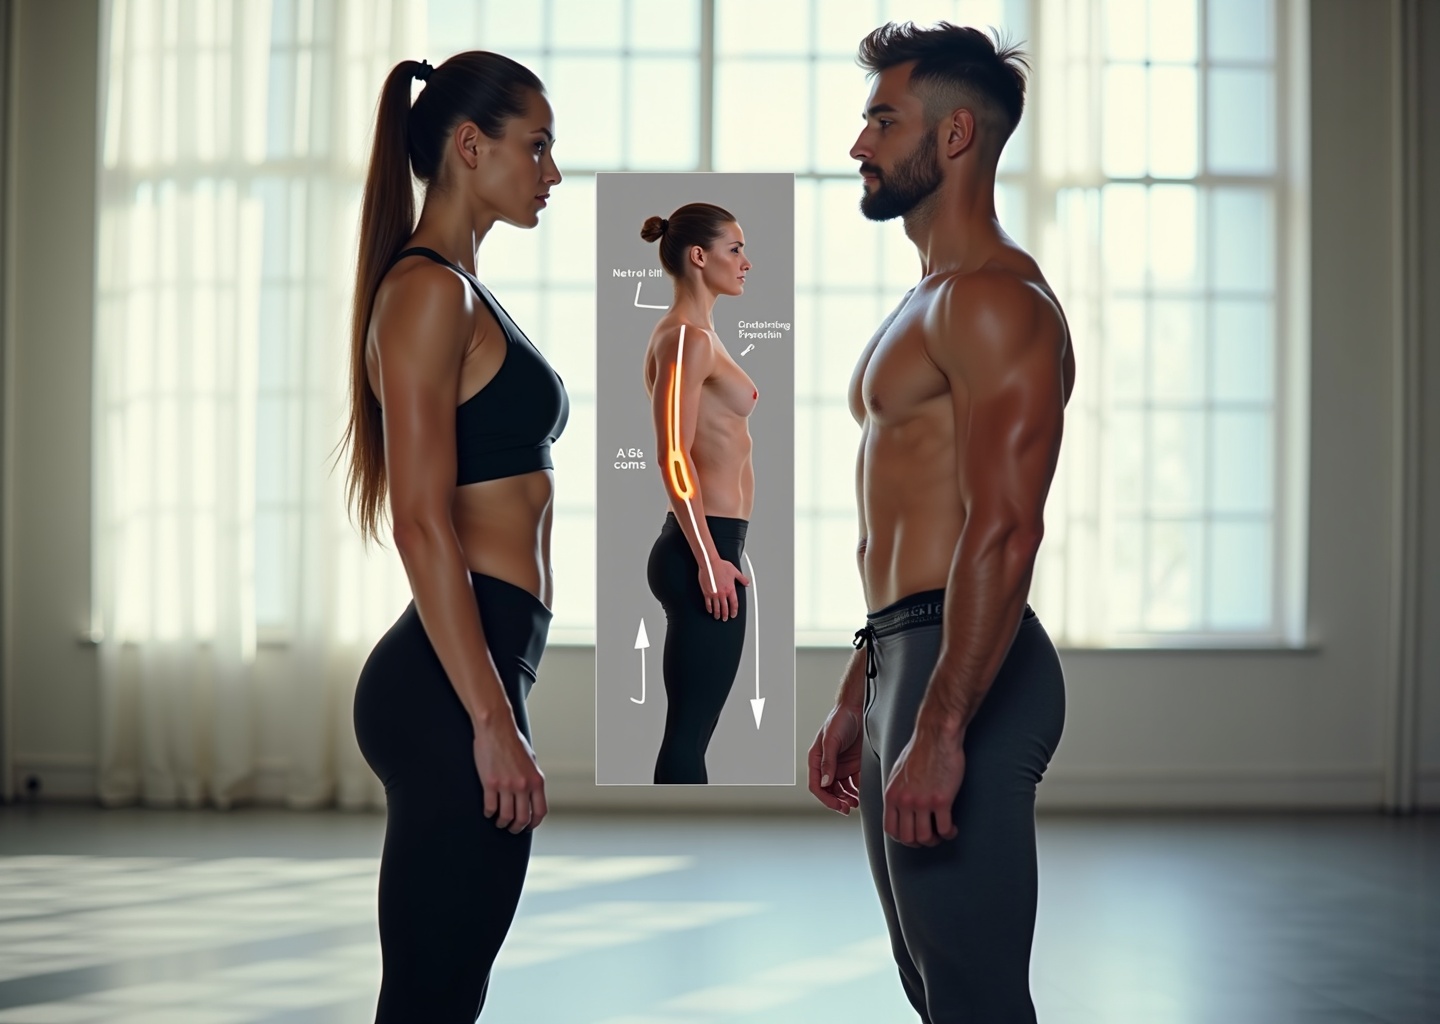
Your standing posture offers the first and most obvious clues. Start by standing sideways to a full-length mirror in your normal, relaxed stance.
Standing Posture Cues
For an anterior pelvic tilt (APT), you’ll likely notice a pronounced arch in your lower back (lumbar lordosis). Your belt line would angle downwards toward the front, and your abdomen may protrude, even if you have low body fat. The crease at the front of your hip will look deep and pinched. For a posterior pelvic tilt (PPT), the opposite is true. Your lower back may look flat, losing its natural curve. Your glutes might appear tucked under, and your belt line would tilt up at the front. The front of your hips will look more open or extended.
Supine Posture Cues
Lie on your back on a firm surface with your legs straight. Try to slide your hand into the space between your lower back and the floor. If you have a significant APT, there will be a large gap, and you might be able to fit your whole forearm through it. If you have a PPT, your lower back will be pressed firmly into the floor with very little or no space for your hand.
Hands-On and Movement-Based Assessments
Visual checks are a great start, but hands-on tests provide more definitive answers about muscle length, strength, and control. Here are some of the most reliable assessments you can use.
ASIS/PSIS Alignment Inspection
This is the most direct way to measure your static pelvic position. The Anterior Superior Iliac Spine (ASIS) are the two bony points at the very front of your hips. The Posterior Superior Iliac Spine (PSIS) are the two bony dimples on your lower back. In a neutral pelvis, the ASIS should be slightly lower than the PSIS. To check, place your thumbs on your PSIS and your index fingers on your ASIS. Look in a mirror or have someone observe from the side. If your index fingers are significantly lower than your thumbs, it indicates an anterior tilt. If they are level with or higher than your thumbs, it suggests a posterior tilt. A smartphone inclinometer app can provide a precise angle measurement for tracking progress.
Thomas Test for Hip Flexor Tightness
This is the gold standard for assessing hip flexor length. Sit on the edge of a sturdy table or bed. Lie back, pulling both knees toward your chest. Then, while holding one knee firmly against your chest, slowly lower the other leg. A negative test (good flexibility) means the back of your lowered thigh rests flat on the table and your knee remains bent to about 80-90 degrees. A positive test for APT-related tightness is when the thigh of the lowered leg lifts off the table, or the knee straightens out significantly.
Prone Hip Extension Test
This test assesses glute activation patterns. Lie face down with your legs straight. Place your fingers on the glute muscle of one leg and on the erector spinae muscles of your lower back on the same side. Slowly lift the leg straight up toward the ceiling without bending the knee. Ideally, you should feel the glute engage first to initiate the movement, followed by the hamstring and then the lower back muscles. If your lower back arches and its muscles fire immediately, it suggests your glutes are not doing their job, a common finding in people with APT and associated low back pain.
Active Straight Leg Raise (ASLR)
This test evaluates hamstring length and lumbopelvic control. Lie on your back with both legs straight. Keeping one leg flat on the floor, slowly raise the other leg as high as you can without bending the knee. A range of 70-90 degrees is considered normal. Significantly less range can indicate tight hamstrings, which are often associated with PPT. Pay attention to whether you have to arch your back or tilt your pelvis to lift the leg higher; this indicates a lack of core control.
Interpreting Your Results
No single test tells the whole story. You need to combine the findings to understand your pattern.
- Classic APT: You’ll likely see a visible lumbar arch, a positive Thomas test, poor prone hip extension pattern, and a large gap under your back when lying down.
- Classic PPT: You’ll probably have a flat lower back, a limited active straight leg raise, and a pelvis that feels “tucked” under.
- Mixed Presentation: It’s possible to have tight hip flexors and tight hamstrings. This can create a pelvis that feels stuck and immobile, unable to move freely in either direction.
- Neutral-but-Stiff: Your static alignment might look good, but you may struggle with the active pelvic tilt test, showing poor motor control and an inability to move smoothly between APT and PPT.
When to Seek Professional Help
Self-assessment is incredibly valuable, but it has its limits. If you experience any red flags, it is crucial to consult a physical therapist or physician. These signs include sharp, radiating pain down your leg (sciatica), numbness or tingling in your legs or feet, progressive weakness that gets worse over time, or severe pain that doesn’t have a clear cause. These symptoms can indicate a more serious issue that requires a professional diagnosis.
Why Pelvic Tilt Matters for Everyday Athletes Performance and Pain Implications
Understanding your pelvic tilt pattern is crucial because its position is the foundation of your movement. For an everyday athlete, a non-neutral pelvic alignment is often the silent culprit behind nagging injuries, performance plateaus, and persistent pain. It directly influences how forces are transferred through your body, whether you’re lifting a barbell, running a 5k, or simply carrying groceries. Understanding these implications is the first step toward building a more resilient and efficient body.
Anterior pelvic tilt (APT), where the pelvis spills forward, creates a cascade of biomechanical changes. The most immediate effect is an exaggerated curve in the lower back, or lumbar lordosis. This position compresses the small facet joints of the spine and creates anterior shear forces, constantly pushing one vertebra forward on the one below it. Over time, this can be a primary driver of chronic lower back pain. For lifters, this presents a major challenge in movements like the squat and deadlift. As you descend into a squat with APT, your torso is more likely to pitch forward, making it difficult to maintain an upright posture and hit proper depth. This often forces the lower back to compensate for weak or inhibited glutes, increasing injury risk and limiting how much weight you can safely move.
Runners with a significant APT face a different set of problems. The forward-tilted pelvis lengthens the hamstrings at their attachment point, putting them in a perpetually stretched and weakened state. This makes them highly susceptible to strains, as they are ill-equipped to handle the eccentric load of running. Furthermore, this position can limit the space within the hip joint, increasing the risk of hip impingement. An anteriorly tilted pelvis also hinders powerful hip extension, which is the engine of an efficient running stride. Instead of driving forward with the glutes, the runner becomes more reliant on their hip flexors and quads, leading to an inefficient, shuffling gait and reduced power output. This altered pelvic alignment can even affect your breathing. APT is often coupled with a flared rib cage, which compromises the optimal function of the diaphragm and reduces core stability for athletes by preventing the creation of effective intra-abdominal pressure.
Posterior pelvic tilt (PPT), where the pelvis is tucked under, comes with its own set of dysfunctions. This posture flattens the natural curve of the lumbar spine, which is crucial for shock absorption. Without this curve, ground reaction forces from running or the compressive load from lifting are transmitted more directly up the spinal column, which can contribute to a different type of lower back pain, often related to disc pressure. The muscles of the posterior chain, particularly the hamstrings and glutes, become chronically short and tight. This severely limits your ability to hinge at the hips, a fundamental pattern for deadlifts and even bending over to tie your shoes.
For a lifter, a posterior tilt makes it nearly impossible to set up for a deadlift with a neutral spine. The back will tend to round from the start, placing enormous stress on the lumbar discs and ligaments. In a squat, a lifter with PPT may struggle to initiate the movement by sending the hips back, instead breaking at the knees and rounding their low back early in the descent. Power production is significantly hampered because a tucked pelvis prevents you from achieving full hip extension at the top of a lift, essentially leaving strength on the table.
Runners with a posterior tilt often exhibit a shortened, choppy stride. The limited hip extension range prevents the leg from trailing behind the body, which is necessary for a powerful push-off. This can lead to over-striding, where the foot lands too far in front of the body’s center of mass, creating a braking force with every step. Improving hip mobility for runners in this case isn’t just about stretching; it’s about restoring the pelvis’s ability to move into a more neutral or slightly anteriorly tilted position during the gait cycle.
It’s important to understand that the goal is not to achieve a perfectly static, neutral pelvis at all times. The pelvis is designed to move. The problem arises when it becomes stuck in one position. Research consistently shows that addressing these imbalances through targeted exercises and improved motor control can significantly reduce pain and enhance function. However, correction is not a one-size-fits-all approach. The strategies for an athlete with APT driven by tight hip flexors will be vastly different from those for an athlete with PPT and shortened hamstrings. The key is to use the assessment findings from the previous chapter to build an individualized plan that restores your ability to find and maintain a strong, neutral pelvic position when it matters most, under load and in motion.
Evidence Based Correction Strategies Mobility Stretching and Progressive Strengthening
A successful pelvic tilt correction program is built on a foundation of smart principles. First, prioritize pain-free movement; if an exercise hurts, stop and modify it. Second, establish control of a neutral pelvic position before adding heavy loads. Third, address mobility restrictions before focusing on strength, as you cannot strengthen what you cannot access. Finally, integrate proper breathing and motor control into every movement, as the diaphragm and deep core muscles are the foundation of pelvic stability.
Strategies for Anterior Pelvic Tilt (APT)
For those with an anterior tilt, the strategy is a classic “lengthen and strengthen” approach. We need to release the tight muscles pulling the pelvis forward and activate the weak muscles that should be pulling it back.
- Lengthen Overactive Hip Flexors
The muscles at the front of your hip are often the primary culprits. The key is to stretch them effectively. A standard Kneeling Hip Flexor Stretch becomes much more powerful when you actively perform a posterior pelvic tilt (tucking your tailbone) during the stretch. This isolates the hip flexors instead of just arching your lower back. The Thomas Stretch is another excellent option. For targeted work on the tensor fasciae latae (TFL), which contributes to hip tightness, foam rolling the outside of your upper thigh can be beneficial, but be gentle; this area can be sensitive. - Activate Underactive Glutes and Hamstrings
Once you’ve created some slack, it’s time to wake up the posterior chain. Glute activation is non-negotiable. Start with simple drills like the Glute Bridge, focusing on squeezing your glutes to lift your hips, not using your lower back. Progress to single-leg variations. Banded Lateral Walks are fantastic for targeting the gluteus medius, a key pelvic stabilizer. The goal here is feeling the muscle work, not just going through the motions. - Strengthen the Core and Posterior Chain
With the right muscles firing, we integrate this new pattern into strength work. This is where core stability exercises shine. The Dead Bug and Bird Dog teach your body to keep the pelvis and spine stable while your limbs move. The Pallof Press is another great anti-rotation exercise that builds core stiffness. For strengthening, Romanian Deadlift (RDL) progressions and Hip Thrusts are top-tier pelvic tilt exercises. Start with light weight or even just a dowel to master the hip hinge pattern, ensuring your lower back doesn’t arch.
Strategies for Posterior Pelvic Tilt (PPT)
Correcting a posterior tilt requires a different focus. Instead of stretching the front, we often need to improve mobility and control in the back and re-establish the natural curve of the lower spine.
- Mobilize the Posterior Chain
Chronically tight-feeling hamstrings in PPT are often a sign of neural tension, not just muscle shortening. Instead of aggressive static stretching, try neurodynamic techniques like “nerve flossing.” Lying on your back, gently extend one knee until you feel a light stretch, then point and flex your ankle. This mobilizes the nerve without overstretching the muscle. Eccentric loading, like performing the lowering phase of an RDL very slowly, can also improve hamstring flexibility and control. - Activate the Anterior Chain and Spinal Erectors
If the anterior core is weak, modified plank progressions can help. However, the main goal is to avoid further flattening the back. Focus on exercises that encourage a neutral spine. Coaching cues are critical here. Think “show your belt buckle” or “lift your chest” during movements like squats and deadlifts to help regain a natural lumbar curve. - Improve Hip Extension
PPT often limits the ability to fully extend the hips. Lunges and split squats are excellent for training hip extension on one side while maintaining a stable pelvis.
Sample 4-Week Corrective Microcycle
This is a template. Listen to your body and progress when you can perform the exercises with good form and no pain. Tracking your progress with photos, pain scales (0-10), or performance metrics (like squat depth with a neutral pelvis) is key.
| Phase (Frequency: 2-3x/week) | Focus | Sample APT Exercises | Sample PPT Exercises | Progression Marker |
|---|---|---|---|---|
| Week 1-2: Corrective | Mobility & Activation | Kneeling Hip Flexor Stretch (2x30s), Glute Bridge (3×15), Bird Dog (3×10/side) | Hamstring Nerve Floss (2×15/side), Cat-Cow (2×10), Bodyweight Squat w/ Neutral Spine Cue (3×10) | Reduced stiffness, able to feel target muscles working. |
| Week 3-4: Integrative | Motor Control & Light Strength | Goblet Squat (3×10), Banded Lateral Walk (3×15/side), Pallof Press (3x30s/side) | Romanian Deadlift w/ Dowel (3×12), Split Squat (3×10/side), Modified Plank (3x30s) | Can maintain pelvic neutrality during bodyweight and lightly loaded movements. |
| Week 5-8: Strength/Transference | Building Resilient Strength | Barbell Hip Thrust (3×8-12), RDL (3×8-10), Weighted Carries (3x30s) | Kettlebell Swing (3×15), Weighted Lunge (3×8/side), Deadlift from Blocks (3×5) | Improved performance in main lifts (e.g., squat, deadlift) with better form and reduced pain. |
Integration and Modifications
For Runners and Lifters
Integrate these movements into your existing routine. Use activation drills like glute bridges and banded walks as part of your dynamic warm-up. Perform mobility work like hip flexor stretches during your post-run or post-lift cool-down. Corrective strength exercises can be added to accessory days. The goal is to make this a sustainable part of your training, not a separate, burdensome routine.
Modifications for All
Beginners should master bodyweight versions before adding load. Older adults or those with previous injuries may need to reduce the range of motion or use support, such as holding onto a stable surface during a split squat. If you have a history of disc issues or significant pain, consulting a physical therapist is the best course of action to get a personalized pelvic tilt correction program.
Common Questions Athletes Ask Frequently Asked Questions
Here are answers to common questions from athletes and coaches regarding pelvic tilt correction.
1. Can pelvic tilt be fixed completely, and how long does it take?
The goal is not to “fix” the tilt into one static position, as a slight, natural curve is normal; the aim is to restore a functional, neutral range. The timeline for improvement varies from a few weeks to several months, depending on the severity of the tilt, your consistency with corrective exercises, and your daily movement habits. Focus on gradual progress rather than a perfect end-state.
2. Are sit-ups and crunches bad for my pelvic tilt?
Traditional sit-ups can worsen an anterior pelvic tilt because they often over-recruit the hip flexors (psoas), which are already tight in many cases. This can pull the pelvis further forward. Instead, prioritize exercises that train the deep abdominal muscles to stabilize the spine and pelvis without this pulling action, such as the Pallof press or bird-dog.
3. How should I modify my squats and deadlifts while correcting my tilt?
Lower the weight significantly and prioritize form to relearn the movement pattern with a neutral pelvis. For an anterior tilt, focus on a slight posterior tuck before initiating the lift to engage your glutes and abs. For a posterior tilt, concentrate on maintaining the natural curve in your lower back and hinging properly at the hips. Film your lifts from the side to check your form or work with a qualified coach.
4. Can running cause or correct pelvic tilt?
Running itself doesn’t cause a tilt, but it can amplify pre-existing muscle imbalances. Weak glutes and a tired core can lead to an exaggerated anterior tilt as you fatigue, contributing to low back pain and inefficient mechanics. Conversely, focusing on strong glute push-off and an engaged core during your runs can help reinforce a more neutral pelvic position. The relationship between pelvic tilt and running is all about your form and foundational strength.
5. Are pelvic belts or posture braces helpful for pelvic tilt?
These devices can offer temporary relief and serve as a physical reminder to maintain a better position, but they are not a long-term solution. Over-reliance on external support can prevent your stabilizing muscles from doing their job, potentially weakening them further. Use them sparingly as a tool for awareness while you actively work on strengthening your own muscular support system.
6. How does pregnancy impact pelvic tilt, and are the corrections different?
Pregnancy naturally encourages an anterior pelvic tilt due to the forward shift in weight and hormonal changes that increase ligament laxity. The corrective focus shifts from “fixing” the tilt to managing discomfort and maintaining core and glute strength to support the changing body. Exercises like cat-cow, bird-dog, and glute bridges are excellent, but always consult with a prenatal specialist or physical therapist for guidance.
7. What are the most common mistakes to avoid?
The three biggest mistakes are focusing only on stretching tight muscles, performing exercises with poor form (which just reinforces bad patterns), and being inconsistent. Another pitfall is aggressively stretching or foam rolling without also strengthening the opposing muscles. True correction comes from a balanced and consistent approach that builds new, sustainable movement habits.
Conclusions Action Plan and Key Takeaways
This section consolidates the key principles into a clear, sustainable action plan. The goal isn’t to achieve a perfectly static, “correct” posture you hold all day. Instead, it’s about restoring your ability to move into and out of different pelvic positions with control, finding a strong and comfortable neutral base for your daily activities and athletic pursuits. True correction comes from a balanced approach that respects your body’s unique needs.
The most important principle is to assess before you intervene. Using the self-assessments discussed earlier to understand your specific tendency toward an anterior or posterior tilt is the critical first step that informs an effective pelvic tilt correction plan.
Lasting change is built on three pillars working in harmony.
- Mobility. This creates the potential for new movement. Stretching and mobilizing tight tissues gives your pelvis the freedom to move into a more neutral alignment.
- Strength. This solidifies that new potential. Strengthening underactive muscles provides the stability to hold and control your pelvic position, especially under load.
- Motor Control. This is the brain-body connection that makes it all automatic. It’s about retraining your nervous system to use this new mobility and strength as your default pattern during everyday movements like walking, running, and lifting.
You need to unlock range of motion and then teach your body how to control it. Finally, this new control must be integrated into the specific demands of your sport. A runner’s needs are different from a powerlifter’s, and your corrective work should reflect that.
Here is a simple, three-step starter plan you can begin today.
- Assess and Re-center Daily.
Spend one to two minutes, several times a day, finding your neutral pelvis. Lie on your back with your knees bent or stand sideways to a mirror. Place your fingers on your pointy hip bones (ASIS) and your thumbs on your pubic bone. Gently tilt your pelvis forward and back, finding the position where these three bony landmarks form a flat plane, perpendicular to the floor when standing. This isn’t an exercise; it’s a practice in awareness. The more you consciously find neutral, the more your body will recognize it as its home base. - Commit to a 5–10 Minute Daily Mobility and Activation Sequence.
This is your non-negotiable daily maintenance. Your personalized mobility routine should target your specific needs. If you have an anterior tilt, this might include a kneeling hip flexor stretch followed by glute bridges and planks to activate your posterior chain and core. If you have a posterior tilt, you might focus on hamstring stretches and cobra poses to mobilize the back line, followed by bird-dogs to activate your spinal erectors. You can find excellent examples of these short routines online, like these 5 Exercises for Anterior Pelvic Tilt. The key is consistency. - Integrate Progressive Strengthening 2–3 Times Per Week.
This is where you build resilience. Incorporate your corrective focus into your regular strength workouts. During squats, deadlifts, and lunges, pay close attention to maintaining a neutral pelvis throughout the entire movement. If you have an anterior tilt, focus on engaging your glutes and abs to prevent your lower back from arching. If you have a posterior tilt, focus on keeping your chest up and maintaining a natural lumbar curve. This is the core of a smart corrective exercise plan.
Progress can be slow, so it’s important to track objective markers.
- Pain and Symptom Scores. On a scale of 0 to 10, how is your back, hip, or knee pain? Jot it down weekly. A downward trend is a great sign.
- Postural Photos. Every four to six weeks, take a photo of yourself standing relaxed from the side. Compare them over time to see visible changes in your alignment.
- Movement Tests. Record a video of yourself performing a bodyweight overhead squat. Are you able to keep your torso more upright? Does your lower back arch less?
- Loading Capacity. Are you able to lift more weight or perform more reps in your main lifts with good form and without pain? This is a powerful indicator of improved stability and control.
While this framework can create significant improvement, it’s vital to know when to seek professional help. If you experience any red flags like sharp, shooting pain, numbness, tingling, or loss of bowel or bladder control, consult a physician immediately. If you follow a consistent plan for six to eight weeks and see no improvement, or if your pain worsens, it’s time to book an appointment with a licensed physical therapist or a qualified clinical professional. They can provide a thorough diagnosis and a personalized treatment plan for more complex cases.
Building a stable, resilient pelvis is a journey of consistent, intelligent effort. Small, daily investments in your movement quality will compound over time. Embrace the process, listen to your body, and apply progressive overload not just to your lifts, but to your control and awareness, building a foundation for years of lasting mobility and pain-free performance.
References
- 5 Exercises for Anterior Pelvic Tilt — Some exercises and stretches, like posterior pelvic tilt, gluteal bridge, squats, and hip stretches, may help reduce anterior pelvic tilt.
- 6 Minute Routine to Correct POSTERIOR Pelvic Tilt — Posterior Pelvic Tilt: 9 Correction Exercises (Mobility Routine) … 4 Key Exercises to CONTROL Your Pelvic Tilt (Anterior & Posterior).
- Posterior & Anterior Pelvic Tilt: How Do You Fix It? – NASM — Foam roll: Sit on top of the foam roller starting just below the glutes and slowly roll toward the knee. When you find a point of tension, hold still for 30 …
- 9 Best Exercises for Correcting Posterior Pelvic Tilt — Glute bridge. Lie on your back with your knees bent and arms next to your torso. · Lunge. Stand with one foot in front of the other. · Cobra …
- How To Fix Anterior Pelvic Tilt (FOREVER) — For adequate stretching, you should perform these pelvic tilt exercises before bedtime or at any time in your daily routine. … 5 Exercises That …
- How to Fix Anterior Pelvic Tilt with Exercises — As you exhale, tilt your pelvis back in the direction of your head. Hold this posterior pelvic tilt position for 5 seconds. · As you inhale, tilt …
- Fix -Anterior Pelvic Tilt- in 10 Minutes_Day (Daily Exercise … — The most effective way to correct it seems to be through strengthening the glutes and abdominals while stretching the hip flexors which are often tight.
- Exercises for Posterior Tilted Pelvis in PT/OT — Therapists can address a posterior tilted pelvis through stretching and strengthening exercises, education on proper posture, and activity modification.
- Hip & Joint Patient Exercises: Posterior Pelvic Tilt — Posterior Pelvic Tilt: 9 Correction Exercises (Mobility Routine) … Do I Have Anterior Pelvic Tilt? Common APT Myths Busted. Upright Health …
Legal Disclaimers & Brand Notices
Medical Disclaimer: The content of this article, including discussions of anatomy, biomechanics, self-assessment techniques, and corrective exercises (such as the Thomas Test, Glute Bridge, and Romanian Deadlift), is provided for informational and educational purposes only. It is not intended to be a substitute for professional medical advice, diagnosis, or treatment. Always seek the advice of a qualified physician, physical therapist, or other licensed healthcare provider with any questions you may have regarding a medical condition, exercise program, or before undertaking any new regimen. Never disregard professional medical advice or delay in seeking it because of something you have read in this article. Reliance on any information provided by this article is solely at your own risk.
Trademark Acknowledgement: All product names, logos, and brands mentioned or implied throughout this article are the property of their respective owners.